
The two lucky winners of my Thanksgiving giveaway are…… Cathy Farrell for the Shelton Farm’s Turkey and Claire Mendenhall is the winner of the Boar’s Head sweet spiral sliced ham! Congratulations to the both of you! Happy Thanksgiving everyone!

The two lucky winners of my Thanksgiving giveaway are…… Cathy Farrell for the Shelton Farm’s Turkey and Claire Mendenhall is the winner of the Boar’s Head sweet spiral sliced ham! Congratulations to the both of you! Happy Thanksgiving everyone!
What is blind baking? And why and when do you need to blind bake? Blind baking is pre-baking the pie shell when you are going to either fill the pie with a filling you are not going to cook or a filling that is not going to bake as long as the crust takes. I also blind bake for a shorter period if I want to partially bake my pie shell to prevent the crust from getting soggy from the filling. I do this in my Hawaiian Inspired Pumpkin Pie recipe.

There are two ways I blind bake. The first is the simplest. With the tines of a fork, I poke holes on the bottom and sides of the pie shell. This prevents the pie crust from bubbling up when baking. This is a one step process. Then I bake the pie shell at 400 F for 10-15 minutes or until lightly golden.

The second way is a two step process. First, you gently line the pie shell with some foil or parchment paper letting the foil or paper hang over the edges of the pie.

Next, you fill the pie with either pie weights (like I have here. Mine are ceramic and keep forever), or you can fill the pie with beans or rice to weigh down the shell to prevent bubbling.

Here is the pie after it has baked. The next step is to remove the foil or parchment paper with the filling and bake the pie shell (first poke the bottom and sides of the pie shell with the tines of a fork) for an additional 5 minutes to finish off the baking. If you only bake with the foil and weights, the bottom of the crust will be a bit soggy. That’s it folks! Pretty simple but makes a huge difference in the outcome of your pie. Now fill this beauty with some pumpkin or cream pie goodness!
I am so excited for this giveaway! Actually it is two giveaways! Two is always better than one when it comes to giveaways, right? For those of you that are local, you are going to love this one. El Toro Meat Market is a great source for natural turkeys and the best quality meat, poultry and seafood. The only place I have found locally that sells all natural turkeys that are not injected with a sodium solution and come from a local farm. The absolute best and most fresh turkey ever!

Below is the only turkey I use. Raised without antibiotics, no animal by products, free range and fed only certified organic feed. The taste of these birds are hard to beat! Especially when made with my special method.
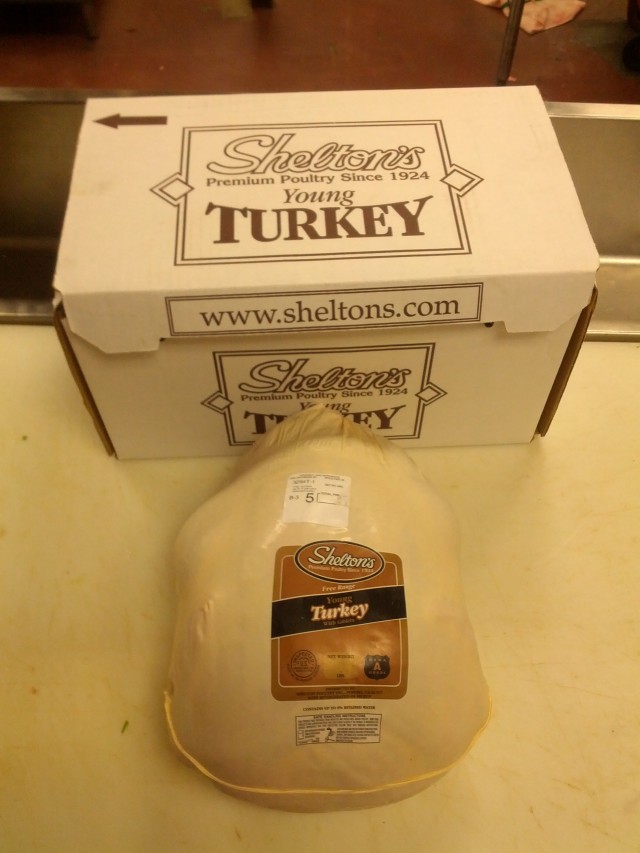
I will be picking one winner for a 16 pound all natural fresh turkey from Shelton Farms. (Valued over $60.00) Oh heck… I will throw in my recipe to the winner. You will have an extra tasty bird this year!
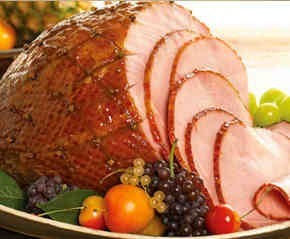
I will also be picking another lucky winner that will win a 5 pound Boars Head Sweet Spiral sliced ham (Feeds 10-12)! You can have up to 5 chances to win:
1. leave a comment with your first and last name and email
2. Share this giveaway post on your Facebook page. Tag Jenny Evans
3. Repost on your instagram, tag @jennyleeevans
4. Share in Pinterest
5. Sign up for my emails (If you aren’t already) or share on your blog if you have one.
Make sure you let me know in your comment all you did so I can count all your entries! Unfortunately, this is for locals only as you will have to go to the store to pick it up sometime before Thanksgiving ( Be sure to meet Bob, the awesome owner). I will be picking a winner on Saturday! Good luck!

I am going to first talk about this trip starting with LAX (Los Angeles Airport), our departure location. Why you ask? Because I want to talk food. I forgot to take a picture of the place, but here are some of my kids enjoying their breakfast we grabbed pre- flight. They are smiling because they love the food! LAX has a great eatery called Lemonade (I think it opened sometime in 2012) and what a welcome treat that is from the standard airport food. I keep hearing that airports are getting all these great restaurants, but it seems that we are always in the terminal that does not offer anything great. Not this time! Yay for Lemonade in the LAX airport! FYI.. we flew Delta and is it close to their gates (It is located in terminal 5). The only bummer was that they were only serving breakfast, so I couldn’t order lunch to go to eat on the plane.

Hello Maui! Ahhhh…. a week of sun, fun and relaxation. We were so excited!
We arrived just in time for lunch so we headed for Mala in Lahaina. We went there last year for brunch and it was fantastic (I highly recommend going there for brunch, which is served Saturday and Sunday from 9:00-3:00)! Mala sits on the water and you often can see the turtles swimming among the water and waves. My kids were in heaven with all the turtle sightings last year. Unfortunately we didn’t see one turtle this year while eating there. Our waitress said it is hit or miss. No matter what time of the day it is. Oh well… at least we had great food!

We started with their signature appetizer, seared ahi bruschetta. It is very good, light and fresh tasting.

I ordered their Chinese chicken salad with a ginger vinaigrette. It was also very good. I would order it again on my next visit.

Our son ordered the special of the day pizza with fresh burrata, figs and olives. It was tasty!

The kids wanted the snap peas as a side to share. You order them mild, medium or spicy. We went medium and they had a bit of a kick to them. Wow…. they were amazing!

Another highlight was their garlic and cheese flatbread. I love anything with garlic and this was full of flavor!

After lunch we headed for our hotel. We stayed in Kaanapali. Gorgeous!

At the far end of Kaanapali beach is Black Rock beach. It is a great place for snorkeling and my kids favorite thing…

Jumping off Black Rock! That’s my Hanson taking off like a bird. My kids could do that all day.

That evening just my husband and I went to dinner on our way to pick up our college aged daughter from the airport. We went to Honu (means turtle in Hawaiian) which is right next to Mala. They are owned by the same people. They have some great food and after flying for so long I wanted to eat light so I wanted another salad and they have some good ones.

They start you out with some fried chickpeas. They are delicious!

This is their Gado Gado salad. It has quinoa, kale, a ton of veggies, tofu and is served with a coco peanut sauce. I liked it but my daughter did not care for the salad dressing. It definitely has a middle eastern taste to it.

Their Kale salad is also very good. It is served with a wonderful lemon vinaigrette that has a slight sweetness to it. You can order it with Ahi or the fish of the day. Their ahi was so fresh and good.

The next day as we were driving to Lahaina, my hubby said, “I wonder if that chicken those people grill and sell off the side of the road is any good? It smells amazing and we pass by them all the time!” I have never noticed it once, but I immediately said, “Let’s go!” We have never pulled off to the side of the road to eat anything someone was grilling off the street before, but hey…. why not? Huli Huli chicken did smell amazing!

This is what they grill their chickens on. And they spray them with their secret marinade. They charged 10.00 for half a chicken a la carte or 8.00 for a quarter of a chicken, rice and corn.

Their were 8 of us (We spent the week with my hubby’s sweet and wonderful parents and four out of our six kids.), so we ordered five half chickens which was actually a bit too much food. We were so hungry, so we went big. They wrap it in foil and you grab napkins and plastic forks and go at it. It was so good! Extremely tender, flavorful and the marinade was incredible. If you see Huli Huli chicken grilling off the side of the road… don’t be afraid to stop. We were glad we did! Check back for more posts on our trip. It was a wonderful week of fun activities and lots of good food that I want to share with you in case you are lucky enough to be in that neck of the woods!
Have any of you made the effort to make a beautiful pie crust (this includes store bought pie dough as well), flute the edges beautifully and bake it to find the pie shell has shrunken down the sides of the pie dish? Your pie just went from beautiful to deformed… ugh! And for the life of you, you cannot figure out how to not make it do that! In my beginning pie making days, that would frustrate me so bad. I would try different pie dishes, covering the dough with foil, pie weights… everything but the one thing that works. I have even seen other bloggers make would be beautiful pies that had the sides shrunken down on a particular side. I would think…”Don’t they know the trick?!” They should know if they are going to “blog teach” others how to make a beautiful pie!
Well my friends, your frustrating pie shell shrinking days are over… hurrah! Let’s go through the very simple steps.
 After you carefully placed your pie crust in your pie dish (For tips look at pie tutorial 1), make sure it is down in the dish very well and trim your crust one inch longer than the edge of the pie dish.

Take the excess crust that was hanging over and fold it under all around the edge of the pie dish.

Go around the whole edge of the pie crust and press the edges together to seal the dough being careful not to press it too thin. No one likes a thin pie crust now do they?

Now you can flute the edges of the pie crust. This is how I like to do it (I press my thumb into the dough with my other thumb and index finger lightly pressing the dough around my thumb). Others like to use their index finger instead of their thumb, starting from inside the pie (the opposite direction of what I am doing). Find what feels comfortable for you. Or you can use decorative cut outs to lay around the edge of the whole pie. You can also go the easy route and press the edges down with the times of a fork. Those are the simplest techniques. *If you are making a pie with a top crust, you don’t need to flute the edges of your pie.

There you go… a finished fluted pie shell.

The final step is the most crucial of all! You must chill your pie shell (in your pie dish) in the refrigerator for at least 30 minutes. Of course, you can chill it for longer. I suggest you lightly wrap it with plastic wrap if you plan on chilling it longer than a few hours to prevent the dough from drying out. If you go the 30 minute route, there is no need to cover the shell. That’s it! I promise you that you will no longer suffer from pie shell shrinkage if you follow these steps. Now, no skimping on the pie chilling time! Next week I will go over blind baking techniques. Your pies are going to look amazing this year!

My sweet hubby and I took a quick two day trip to Vegas recently. I am not a big fan of Vegas like so many others are but wow, they have a plethora of amazing restaurants! Now that right there is enough to win my heart!

This was our first stop after arriving just in time for lunch. We ate here last year or so and it was amazing. Some of the best tapas I have ever had. Julian Serrano is located in the Aria hotel.

This is my favorite thing on the menu. This is their beef tenderloin and cheese crostini. Trust me and order this of you ever have the chance to eat here. Lots of good flavors going on with this gem.

Their mushroom risotto is perfection. We couldn’t get enough.

This is their stuffed dates. Our waiter recommended this and it wasn’t up our alley. It was overly sweet and we couldn’t taste much but the sweet dates. I also do not recommend their paella. It was probably one of the worst paellas I have ever had. Funny, because they do so many things so good.

We ordered their pistachio tart for dessert. It was ok. And it wasn’t a tart! I am kind of bugged by restaurants that think they are being creative calling something a particular dessert when it is clearly not. This is a perfect example. I actually don’t care for any desserts here (and I think I have just about tried them all). I would eat here and go elsewhere for dessert.
With that said, they have many other wonderful dishes to try on their menu, which by the way is pretty big. Their spanish tortilla is fantastic and they put a twist on it by wrapping it in a puffed pastry. I can’t remember everything we ordered the first time we were here, but we ordered a lot of food and I remembered being so impressed with their dishes. On another note, this restaurant is a very busy and loud place at dinner time. The typical Vegas scene. The nice thing about a tapas restaurant is that you don’t have to watch your portions. You leave feeling not overly full, just satisfied!

For dinner we decided to go to Mesa Grill after hearing rave reviews from others that have eaten here. It is located in the Caesar Palace Hotel, not the Caesar’s Forum Shops (important information for parking).

We started with their blue corn lobster tacos. WOW. They did not disappoint! Yes, they are that small… they are under their “starters” so we will excuse the size. Except once you bite into them, you will wish they were much, much bigger!

This was another amazing appetizer. Their Cremini Mushroom Quesadilla. I cannot recommend this enough!
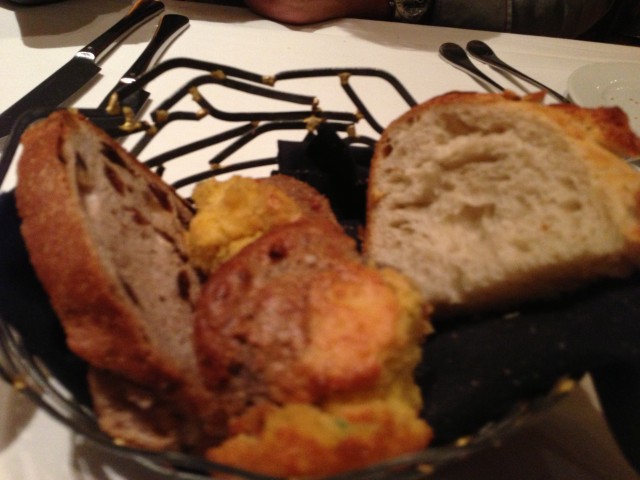
Sorry for the blurry shot! Sometimes the bread bowl is worth mentioning and we loved the variety of breads they served. We went through two of these because we simply could not resist! I love me some good bread.

This is their Rough Cut Tuna Nachos. I know… it does not even closely resemble nachos but they were very good.

We ordered their Green Chili Cioppino for our main entree. The waiter recommended it and it fell way short. At these prices, it is even more disappointing to eat something that you would rather not eat. Which we pretty much did… that is… not eat it after tasting it. 40.00 down the drain. Win some, lose some.We also ordered their signature side, Roasted Corn. The flavors were good, but it was clearly made with frozen corn. Really? At a restaurant of this kind and price range, shouldn’t they use fresh corn? I definitely think so. For that reason I do not recommend it. The texture of frozen corn fell way short.

Here we go again… this is what they call their Banana Cream pie. Another recommendation from our waiter. It was not good at all. The cream was pasty and grainy. Being that this was a recommended dessert, I would pass on dessert here too. I am so disappointed when restaurants focus on their dishes but not put enough emphasis on their desserts. I for one love desserts and find it a perfect ending to a good meal if it is done right. After all… we want the calories and splurge to be worth it, right?

Lately when we have come to Vegas, we have stayed at the Trump hotel. If you are not a gambler and want to avoid all the smoke, this is the hotel for you. No casino… no smoke… no racy pool scene. Just up my alley! And the rooms? We have stayed in the corner suites and they are big and beautiful. And it is located right across the street from the Fashion Place mall! Not that I like to shop or anything. (I know… ya right!) The food here in the restaurant off the lobby is fantastic. Amazing Croque Madame’s for breakfast. Great bruschetta’s for lunch. We also had a salad and seared ahi. So good!
 For our last dinner we went to Samba Sushi. I went to this place in Miami last year and died over the food. It is a fusion of Japanese, Brazilian and Peruvian food. Such a great combination of flavors! I was so excited to learn that they opened up a new location in Las Vegas! This place is located in the Shops of Palazzo.
 We started with these Yellowtail Crispy Taquitos that is served with a wonderful aji panca sauce. It was amazing.
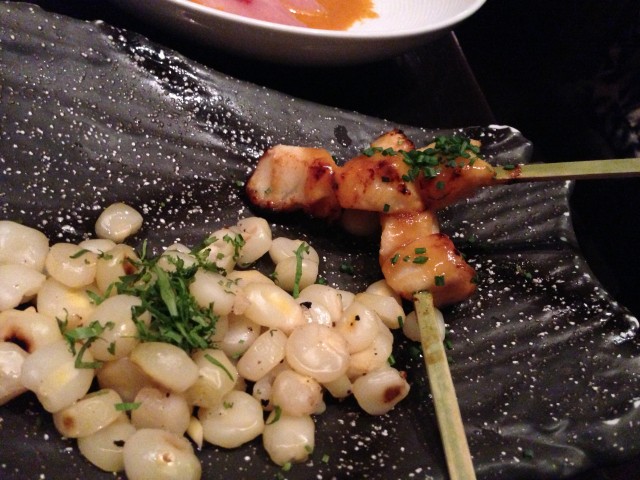
Another highlight is their Sea Bass on skewers Robata with Peruvian corn. It was so amazing, but as you can see the portion size leaves you wanting for so much more!

This Mushroom Toban- Yaki was another unforgettable dish. It was so good and so original. We also ordered some sushi rolls, but they were just like pretty much any rolls you would get at a good sushi place. Not that that is a bad thing, I was just looking for something different from the ordinary. I wouldn’t order rolls here again because of all the amazing fusion food they have to offer. I am not sure if the menu varies a bit from location to location (There is one in Miami, Las Vegas and New York City). But I think I preferred the one in Miami. They seemed to offer more dishes. I very much enjoyed my meal here though.

Before we headed for home, I wanted to find the Bouchon Bakery that is located in the Venetian hotel. I haven’t had a chance to try this bakery yet and I wasn’t going to let this opportunity pass me by.

To my utter delight I found that they pride themselves on their Kouing Aman. It was very good, but Les Madeleines in Salt Lake City has them beat. It was a close second though! My hubby agreed.
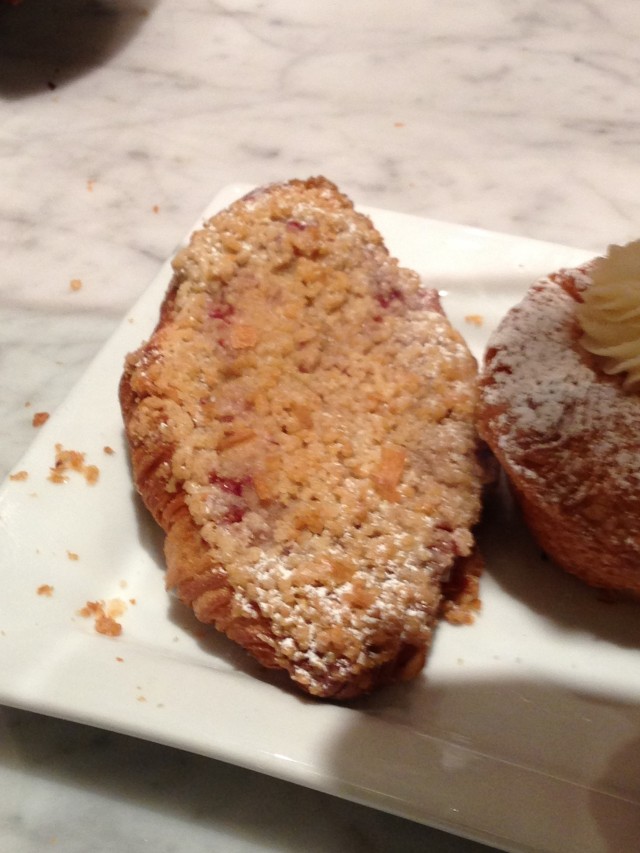
This is their strawberry and custard like filled pastry. So good. We also tried their croissants (Wonderful with a buttery crisp exterior), tropezienne (a brioche pastry filled with strawberries, diplomat cream and topped with streusel) and their chocolate chip cookies. It was all very good. Their cookies are the flat and crispy type, which is not my favorite kind of cookie but we all like our cookies different… don’t we?
So there you have it. Two food filled fun days! And… it was worth it!
 Do you want to make your pies stand out? Decorate them with pie crust cut outs to make them even more beautiful. I will walk you through the steps on how to do these.

You know the extra dough you are left with after you make your pie shell? Don’t throw them out! It takes just a minute to make something awesome with it for your pie.

Roll out your dough on a well floured surface. You don’t have to flour the top of the dough. And you can roll it out into whatever shape works best for you.

For the Hawaiian Style Pumpkin Pie, I used a mini pumpkin cookie cutter to make little cut outs for the pie. I have a few different sets of these mini cookie cutters I have purchased from Sur La Table and Williams Sonoma. They come in a variety of shapes. Flowers, animals, fruits, leaves, etc… I don’t use them for mini cookies, I use them for my pies.

Roll your dough out to about 1/4 inch thick and cut out whatever shape you are using. Before I bought these mini cookie cutters, I used to cut out leaves with a knife free hand. That is also easy to do. Just another idea.

Cut out as many as you can. You can roll out the dough again to cut out some more if you need to.

I always have a parchment topped plate nearby that I can place the freshly cut out pieces on. After you have cut them all out, place your plate in the refrigerator for at least 30 minutes to ensure the pieces of dough will not shrink in size when you bake them.

After you have chilled them for at least 30 minutes, slide the parchment paper onto a baking sheet. Place them in a 400 F preheated oven for 12 minutes or until they are a light golden brown.

I let the pieces cool and if I am not serving the pie right away, I keep them in a ziploc bag until I am ready to use them. I never place them on my pie until I am ready to serve the pie so they don’t get soggy. You can either decorate the top of the pie (which is usually what I like to do) so your pie has a beautiful presentation.

Or you can place them on individual pieces of pie right before serving them so everyone gets a decorative cut out on their own piece of pie. Your guests will notice the extra mile you went and it will be our little secret that that extra mile was actually a “piece of cake” easy! I hope you give this a try on your pie or pies this Thanksgiving. Trust me…. your friends and family will think you are Martha Stewart talented!

Here it is…. THE PERFECT ROASTED TURKEY. The recipes from this class will be used time and time again and year after year for all those that came, learned, feasted and enjoyed! This turkey will be the star of the meal… no longer to be the dry, bland accompaniment to all the other dishes we serve with it to help it along. Am I right class?!
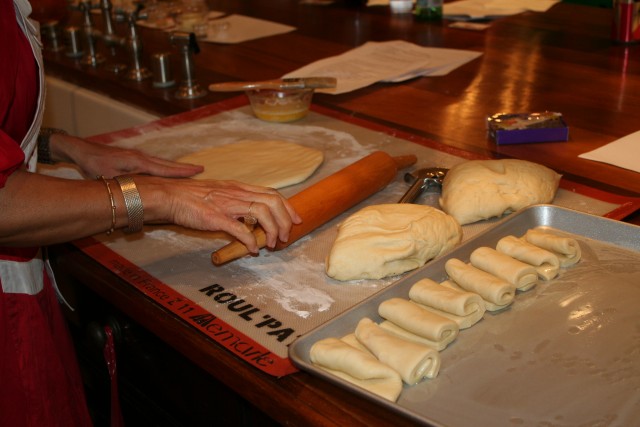
No Thanksgiving meal is complete without rolls…and they have to be amazing. I taught how to make these amazing, fluffy, yet tender and buttery Parker House Rolls.

As you can see, I made a lot of these rolls and they were dusted off almost immediately. Good job class! That’s what happens when you make rolls that are irresistible.

Teaching all my tips and tricks for making pies. I absolutely love making and eating pies! It is an art to be shared.
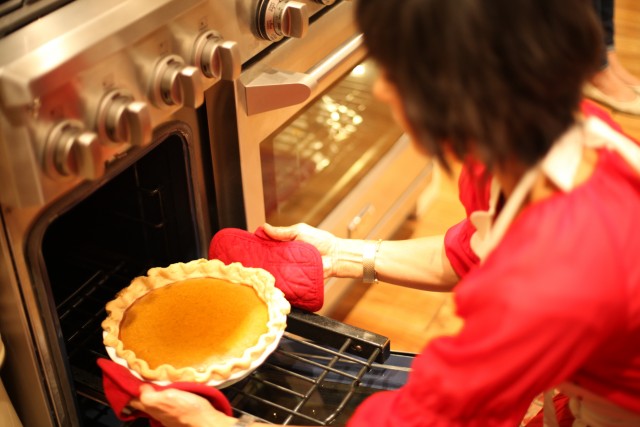
Freshly baked!

Lots to learn and lots of note taking!
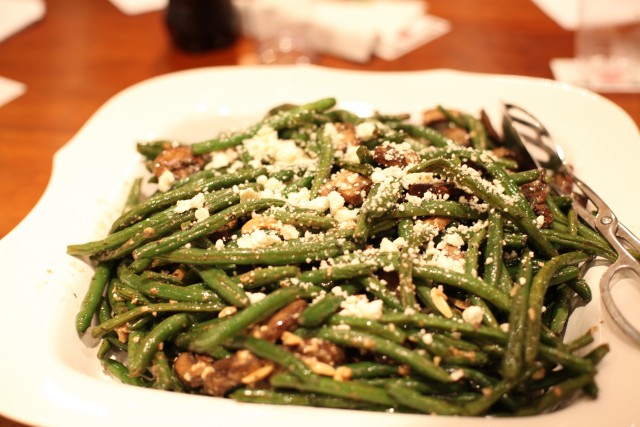
My roasted green bean and mushroom salad. This is the most amazing vegetable side dish to hit a Thanksgiving table. In fact, it is too good to only serve at Thanksgiving. We all decided this will be a staple in all dinners!

These potatoes may not be the most photogenic dish but believe me when I say that they are “knock your socks off” good! Most definitely a must for a Thanksgiving meal!
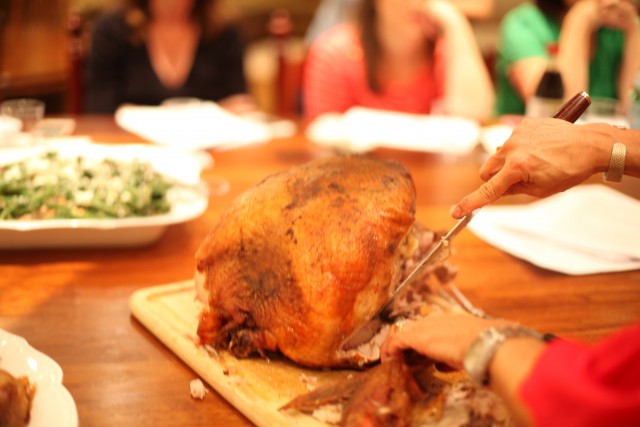
My dear hubby is the one that always carves the turkey, but since he was out of town during my classes, I had to do it and in front of the classes for my first time. If I do say so myself…. I think I did pretty good! I will still let my hubby do the honors though. Most definitely.

Here I am with some of the sliced turkey I just carved. The picture doesn’t look too good, but it was!

A close up of the turkey breasts. Tender and flavorful!

Time to dig in!
 All the “goods” including the perfect, most yummy gravy we also learned how to make.
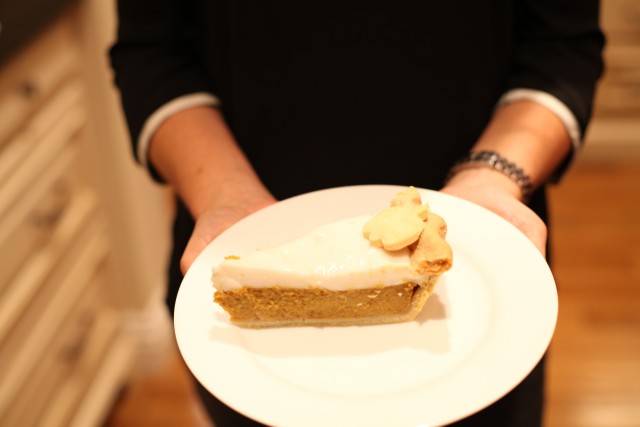
Of course we had the perfect finish to our Thanksgiving meal. My Hawaiian Inspired Pumpkin Pie…. to die for…seriously! And lucky for you I posted this up on this blog… just click HERE!

This cute gal’s face shows it all! It was a fun and most delicious night! Thanks to all that came!
With Thanksgiving right around the corner, I am going to do a series of very helpful tips that will help you as you work with pie dough. A new tip every Tuesday until the big turkey day! I know it can be a very hard and frustrating thing if you don’t know exactly what to do. Dough that cracks, breaks up when you transfer it to the pie dish, crust that shrinks when you bake it and the list goes on and on! But never fear… I am here to help you and give you the confidence to make your own pies!
First and foremost, I posted a new recipe from my last class (Thanksgiving Feast) and it is an “out of this world” pumpkin pie with a detailed recipe for the best pie dough. So be sure to try that recipe if you want a really good one!
This week I am going to teach you how to best handle and roll out the dough so it is circular and the perfect shape for your pie dish. I am also going to show you how to best transfer the dough to your pie dish without it falling apart on you. This is a long post, but I need to show you every step!
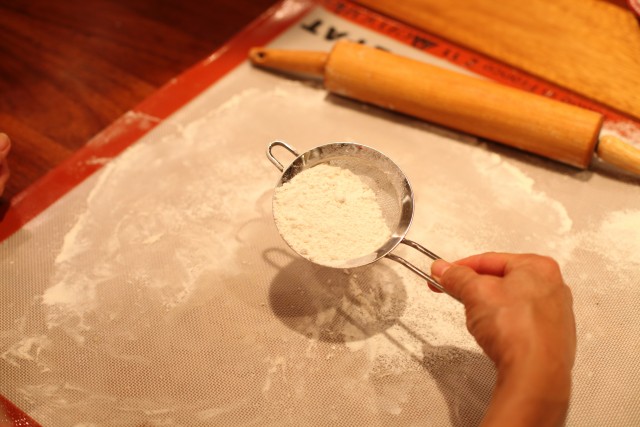
Here is what you need to start. A nice large working surface (I love to use my big silicone mat), a light rolling pin (Marble is too heavy), and a little mesh strainer that will work as a little sifter for the flour. With the flour filled strainer, cover a nice, big, circular area with flour.
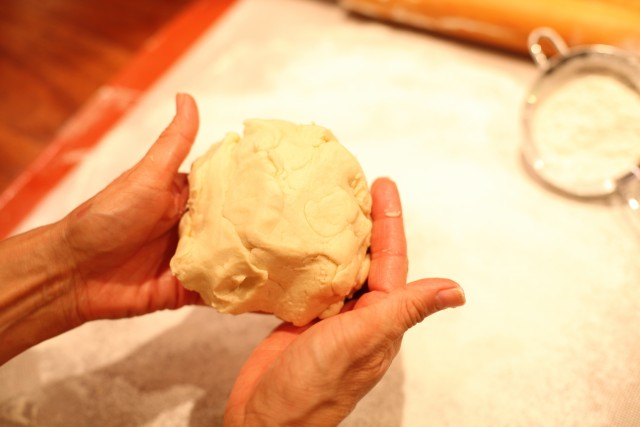 Here is your mound of dough right after it is mixed and ready to be rolled out.

The first thing you need to do is gently (you never want to over work or over handle your dough or it will be tough.) form a disk and seal the edges as best as you can to prevent the edges from cracking when you roll out your dough.

Lay the disk down on the well floured surface and generously sift flour on top of your disk.
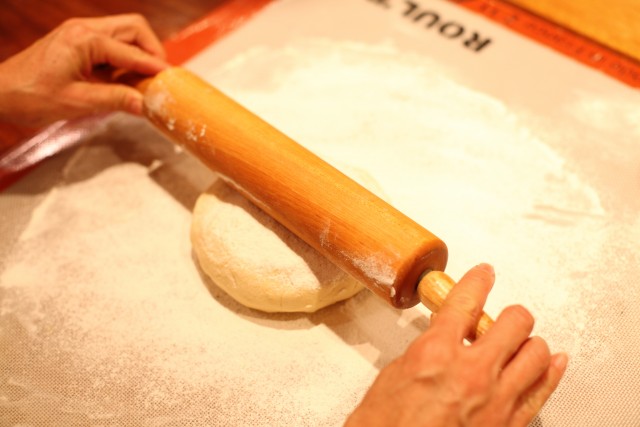
When you roll out your dough, it is important that you roll from the center out. Imagine a dot in the middle of the disk. That will always be your starting point.
I rolled out from the center and will go back to the center again and roll out to another side of the dough (going around the whole dough) making my disk a bigger circle.

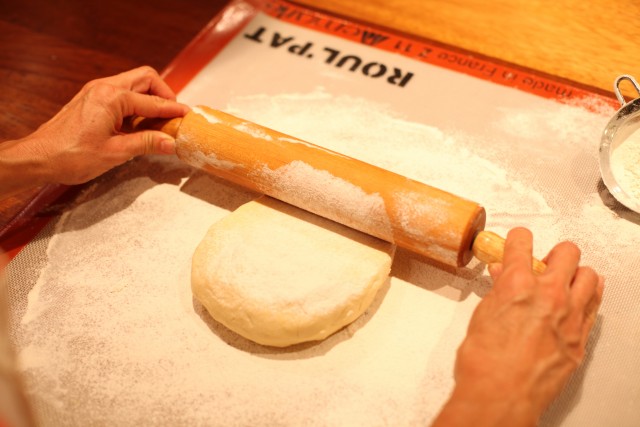
Once I have rolled it out about half the size I want it to be, I will re-flour the top of the dough and flip it. Then I will flour the top side.

Now I will repeat the steps. Start from the center and roll out increasing the size of the circle. Going around the dough in all directions; always starting back at the center point.

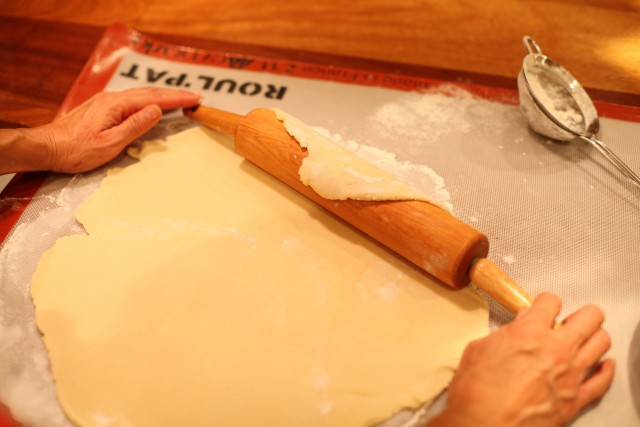
Once I have reached the right size, I am done rolling. Your dough should not be too thin. Now to transfer the dough to the pie dish.

Make sure to have your pie dish nearby. By the way, I highly recommend ceramic pie dishes. They bake more evenly and give the best flakey finish to the pie crust!
Start by taking one end of the pie dough and wrapping it over the top of your rolling pin.

Without putting much weight on the dough, lightly roll the dough over the rolling pin towards you until it is all rolled up around the rolling pin.

Without pushing the rolling pin on the pie dish (Or the weight of the rolling pin will tear the dough), gently unroll the pie dough off the rolling pin onto the pie dish.

A light touch is so important! See how easy that is? Now we are ready for the next step! Next week’s tips will help you through that. Stay tuned!
Here we go…. Appetizers Class Round Two! You cannot get enough great appetizer recipes and ideas, especially around the holidays! These ones will knock your socks off!
 Isn’t this a beauty? You will flip over this one. Yummy and so functional as the Shepherds bread bowl for dips we all buy so much of during the holidays. I am so done with finding this bread sold out so often at the stores during the holidays so I decided to make it! SO glad I did because this one tastes “to the moon and back” better than the store bought version. And so cheap to make! And being shy in the background is the Amazing Baked Artichoke Dip. Of course I transfer it into this bread to serve. Don’t be silly!
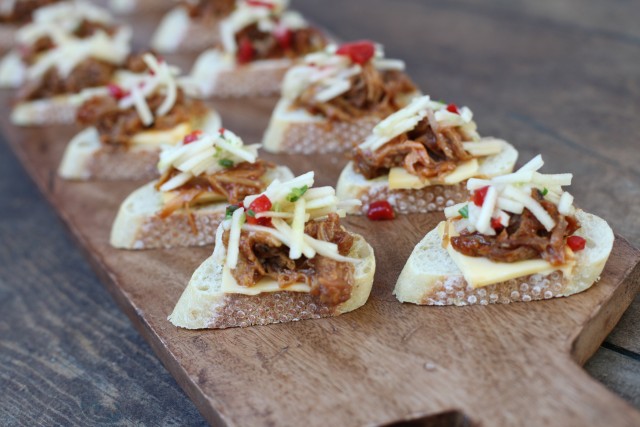
I absolutely love crostini’s! What’s not to love…. a nice crusty bread, toasted just so with flavor packed toppings thoughtfully chosen to sit on top in the perfect layers…. YUM! I branched out and went BBQ flavored on this one. I never had, seen or heard of one like this before but I hit gold people! This is a BBQ Pulled Pork Crostini with a delicious Apple Slaw and some other delicious flavors under all that.
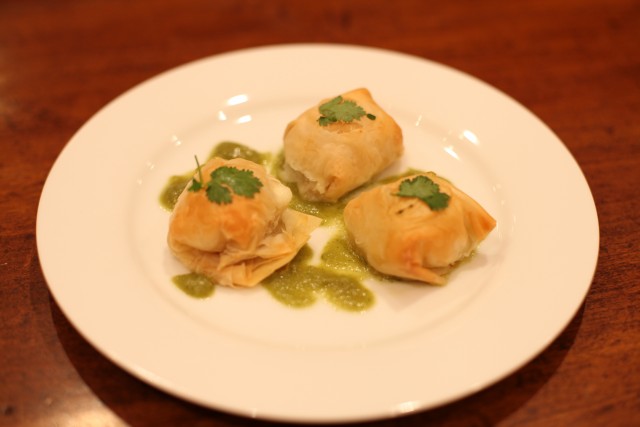
These babies are my new addiction. Greek and Mexican fusion = perfection! These are Queso filled Phyllo Dough Packets with a Cilantro Verde Sauce. Can’t get enough!

Do you have a perfect hummus recipe? If not, you need one and this is it! Everyone needs an amazing hummus recipe … really… you do! This is a new staple in our fridge. This here is my hubby’s addiction. He takes it to the office in little containers and gets giddy thinking about snacking on it. Again… really! I will also teach you how to make those amazing baked pita chips because you have to have pita chips when you eat your hummus!
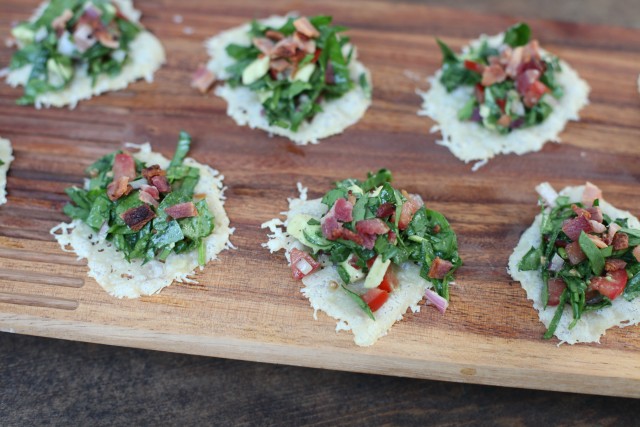
And last but not least are these Spinach Salad Topped Cheese Crisps. I love me some lighter appetizers to munch on in the mix. Lots of good things going on with these. Please don’t think these are complicated, hard to do appetizers. That is the last thing we need during the holidays! You will be surprised with how easy these are to make and put together. Beautiful and delicious can be easy as I will show you. I am your friend… not your foe!
These classes will be held on Thursday, November 14th and Friday, November 15th at 5:30. Please email me at jennyleeevans@gmail.com to reserve a spot. Once, I confirm your spot, you can send me your 60.00 class fee. I hope you can join me for another fun and delicious night! Click HERE for more information.