Blog

Chinese New Year 2014 Gathering

I have never celebrated Chinese New Year in my life. But last week, I heard someone mentioning it, and I thought to myself, “What a fun excuse to have a dinner party with friends! (Not that I need an excuse) ” With less than five days notice, I called some friends and invited them over to join us for a fun and delicious night. And what a fun dinner party it was! 

IMG_9275

I got to work shopping for decorations and Chinese New Year themed table top items. I wanted red to be the most prominent color, but I also wanted to incorporate other colors in so I bought bowls in three colors to use with my basic white plates. I found porcelain white Chinese soup spoons for 1.00 each at World Market to use along with bamboo chopsticks. 

For a table runner, I found a black asian inspired print fabric and a simple red fabric. I cut and sewed them so I could layer them like you see above. Just the look I wanted!

I found the pleated circular fans hanging on my chandelier at Party City. Do you see the Chinese hats hanging from the sconces on the back wall (Actually you can only see one. The other one is hidden behind the hanging pleated fan)? Another Party City find. Love them all!

IMG_9280

I found these Chinese lanterns at Party City too. I just love these paper lanterns. 

IMG_9308

This is the year of the horse. Luckily my boys had this horse in their room. The animal changes every year. 

IMG_9304

According to Chinese beliefs, during this time you should display oranges and tangerines. They symbolize wealth, happiness and health.  Yep…. three good things.

IMG_9315

It is also a Chinese tradition to hand out money in red envelopes. Instead, I gave everyone a red bag filled with “silver” chocolate coins, “gold” kisses and “fortune” cookies. Our guests are sure to have a prosperous 2014!

IMG_9274

I laid out Chinese almond cookies along the table runner along with some other Chinese knick knacks I found at World Market. As you can see… so many fun symbols to decorate with for a dinner like this! We also printed out the background and meaning of the different animals that one is according to your birthday month and year so we could read up on it. It is very interesting and for me it was spot on! I am a dragon. Great conversation starters as our friends were arriving and mingling. Here is the table right before our guests arrived. 

Image 2

I opened up our front door and ….. what a fun sight! Mike and Cora… you are so awesome!

thai chicken

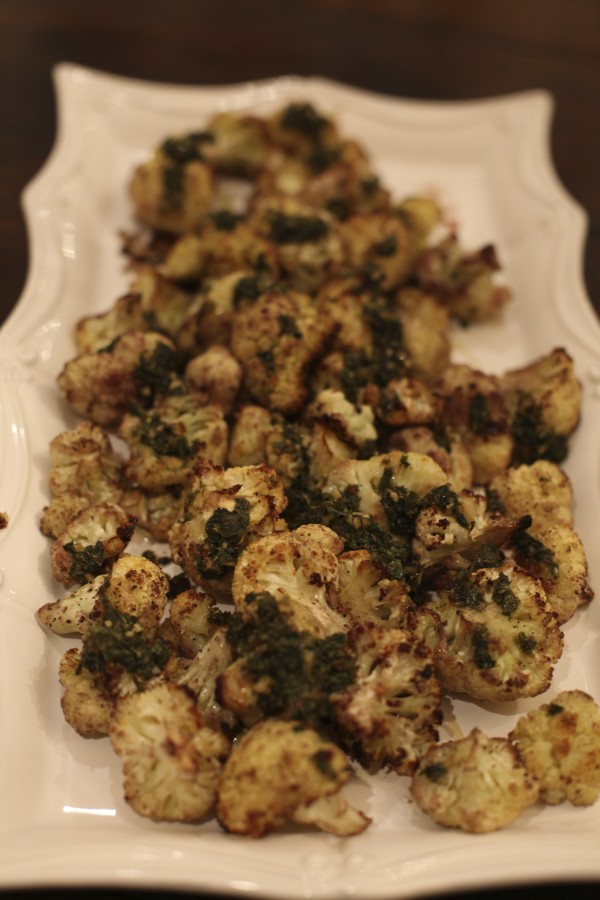
The food was not so much Chinese food. I would call it Asian fusion. This was a Thai curry inspired stir fry. We also started with a Thai soup and lettuce wraps. 

IMG_9340

This is an Asian salad that is out of this world good! 

IMG_9332

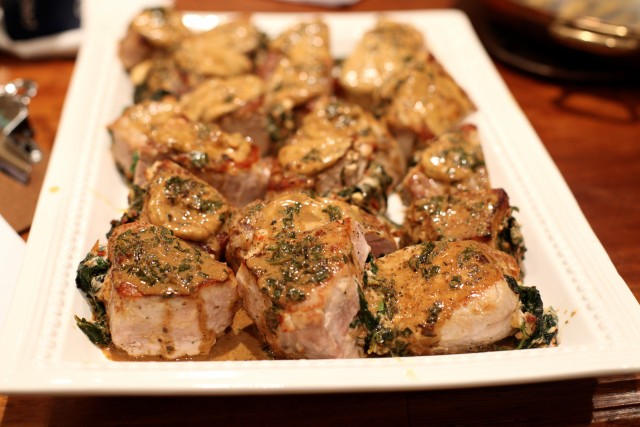
Salmon with an Asian flavored glaze. One of my favorites.

Image 1

For the finish we had chocolate flourless cakes served with coconut ice cream and a raspberry sauce. Don’t worry … this is going to be a future class menu (most of them at least). Has to be!

IMG_9325

Ok friends, you have a whole year to plan a fun Chinese New Year dinner party yourself. It was loads of fun and so delicious. But the best part was spending it with wonderful friends. Perfect way to start off a new year!

Leave A Comment ~ 2

Pizza- Fast and Delicious!

Pizza fast and delicious


Who doesn’t love pizza? This is my “from scratch” pizza that I can make in less than 30 minutes! And boy is it delicious! Click HERE for the recipe. No more excuses people…. most everyone has 30 minutes to make dinner… so let’s get cooking! 

Leave A Comment ~ 0

Tuesday’s Tools and Tips- Garlic Made Easy!

IMG_8652Have you ever found peeling the skins off garlic cloves a pain in the “you know what”? Try peeling up to 100 cloves for a cooking class! Today’s tip is all about the “tool” and a “tip”. My first tip… the type of garlic you buy makes a huge difference! I found these bulbs of garlic imported from China the easiest to peel BY FAR. Funny thing…. I didn’t buy these at an asian market. I find these packs of garlic bulbs in my local carnaceria. Go figure! These are the only garlic bulbs I buy… to save my sanity and time! Look for garlic bulb packs like this from China in your area.

IMG_8636The must have tool for this job is a stainless steel meat pounder like this one. I got this one at Sur La Table and use it for a ton of different uses. 

IMG_8641

Come down fairly hard on the top of the bulb with the pounder and……

garlic

Voila! The cloves will separate and some will automatically come out of their skins. For those that didn’t, just give them a light pound and the skins will fall right off effortlessly. And I mean effortlessly! 

IMG_8648

Look at those naked cloves…. lovely to all garlic lovers like me!

IMG_8656

Remember when I told you about the many uses for this tool? After you are done de-skinning (Yes I make up my own words and I like it) the cloves, rub your fingers on this stainless steel tool and  voila…. the garlic smell will disappear! Pretty cool, huh? Happy Tuesday everyone! 

Leave A Comment ~ 0

Maui Eats and Fun Part 2

With so much going on I have not had a chance to finish sharing you with you all the rest of my Maui Trip post by post. So much good food and fun to share with you! So here we go…

IMG_0160_2

Let’s start with my favorite place in all of Maui…. Ululani’s! And here is the crazy thing… I don’t really like shaved ice!  That is, until I came here. I am seriously obsessed with this place! It is a daily addiction when on this island. 

IMG_0165_2

It is an obsession with the whole family. They have so many flavors and we all have our own favorites. My personal favorite is the filipino lime and passion fruit over a scoop of coconut and a scoop of macadamia ice cream. My mouth is watering just thinking about it! We tried the top recommended shaved ice places on the island and no one even came close to this place. Make sure you stop here and remember…. I warned you about how addicting it is!

IMG_0171_2

I heard about this place and had to try it. It is a casual outside eatery that sits by the ocean and the prices will make you happy… very reasonable unlike most places on the island. I will go over the best dishes we tried. If you can’t tell by the name, they serve mostly traditional Hawaiian type food. 

IMG_0183_2

The lighting was terrible so sorry for the poor quality of the photo. This is their Korean BBQ ribs (aka Kalbi) and being a Korean I know good kalbi. This did not disappoint!

IMG_0179_2

If you are a garlic fries lover like we are you want to order theirs! Yum!

IMG_0186_2

Oh my… their poke was one of the very best poke we have ever had! Order this? Definitely!

IMG_0187_2

Their highly recommended pineapple upside down cake was so good I am showing you a blurry photo of it. Get it… that’s all I have to say. 

IMG_0240_2

The next morning we headed to The Gazebo for breakfast and found a 45 minute line. A wait is standard for that place but we were too hungry to wait that long so we headed a cove or two over to The Sea House. 

IMG_0241_2

Just look at the beautiful bay this restaurant overlooks and sits on! This restaurant gets five stars on their view and atmosphere.  Ok…. on to the food!

IMG_0246_2

Their chicken butter lettuce wraps made the grade and makes for a great starter.

IMG_0251_2

This is the Polynesian Chopped salad and oh my goodness… I want to go back for this alone! See that edemane puree on top? Yum!!

IMG_0250_2

As simple as this stir fry looks, it was delicious! Another winner.

IMG_0249_2

And last but not least, are their fish and chips. My in laws love fish and chips and they were ooooohhhing and aaaaaahhhing  with each bite. I would make a pretty good guess that this is a definite pick for you fish and chip lovers! On a side note… my son really wanted fried rice (a common dish eaten here on the islands) so he ordered it of course. It was tasteless and bland. Bummer for him!

IMG_0254_2

After breakfast we decided to go for a drive on the other side of the island that none of us have ever explored before (past Kapalua). We heard there was fabulous banana bread to be tried over in those parts, so off we went! The road is very, very, VERY narrow in parts (as in only one car can travel on it at a time) and we hit a jam up as there was traffic coming from both directions (and to make things more interesting, there were no guard rails on the narrow road with a drop off hundreds of feet below! Yikes!). Lucky for us, an impatient native got frustrated with us tourists messing up with his commute so he directed everyone and got the jam cleared up and everyone on their merry way. *Another side note, two of my kids were pretty much freaking out looking out the window down the drop offs. They thought for sure we were going to go over. This drive is definitely not for the faint of heart! I thought it was a great adventure!

IMG_0261_2

IMG_0262_2

After all that drama… we finally arrived at Julias… the banana bread shack! My true opinion? I wouldn’t drive 2 minutes for this bread. Not sure why it is so famous. Maybe for the fun adventure of finding it? They did have an awesome dried coconut candy type stuff though. 

IMG_0365_2

Later that night, we headed to this place in Whaler’s Village in Kaanapali. Truth be told, the other restaurants had too long of a wait and this one didn’t, so we gave it a shot. I know that is never a good sign but we had a good experience here. 

IMG_0363_2

I wasn’t very hungry so I ordered this starter plate of roasted Brussels Sprouts Milenase. It was divine! My father in law looked over at my plate and asked what I ordered and when I told him brussels sprouts, he wrinkled his nose in disgust. I asked if he liked brussels sprouts and he told me his mom used to make them when he was a kid and made him eat the disgusting little things. Ha! I told him brussels sprouts have come a long way since then and asked him to give it a try. He couldn’t believe these were the same things he was forced to eat as a kid. Preparation is key in all things!

IMG_0361_2

Another starter (can you tell none of us were very hungry this night), that was very good was their poke. We love a good poke!

IMG_0358_2

Their burger also did not disappoint! We didn’t try any of their pasta, but we would definitely come back here. Another fun and food filled day on the island. Truly paradise!

Leave A Comment ~ 0

Quick Dinners 2 Class Recap

My last “quick dinners” class was so popular, I got a lot of requests for another one and I was happy to oblige. As I was telling my classes …… we are busy people (I get it because I am one of them!), and I know it is hard to put together a dinner for our family in our hurried lives. But I also know that we make time for the things that are important to us. I can’t tell you how many times I have been tempted to pick something up on our way home from one of my kid’s practices in the late hour….. but I know their bodies and bellies will thank me for a home cooked meal where I know every ingredient that is going into it. It is then that I decide I can take 30 minutes to make a delicious meal that will be done by the time the kids get out of the shower. We all feel a lot better for it. Most everyone can find 30 minutes to make a meal. And these aren’t just any meals… no.. these are great dishes your family will love you for! 

IMG_8349

My favorite go to fast dinner is my pizza… all from scratch (dough and sauce too!). I can whip two of these babies out quicker than I could call for delivery and have them at my doorstep. This is always a family favorite. This tasty beauty is one I made in one of my classes. Yes… everyone oohhhed and ahhhed and tasted the difference in “from scratch” pizza to the “other” ones. 

IMG_8345

This is another crowd pleaser no matter who you are. Pasta Carbonara… YUM! Comfort food at it’s best and boy is this fast to whip up! And I whipped up enough for 20 people lickety split!

IMG_8381

Sometimes we need to go lighter and this dish fits the bill. I taught this Soy Honey Chicken that goes perfectly with rice or steamed or sautéed vegetables. Perfect for you low carb eaters as well as hungry kiddos 

IMG_8403

Here I am demonstrating my Carnitas Calzones. These babies are so dang good!

IMG_8437

Just look at these! All ready to serve after a quick five minute bake in the oven. Mmmmmmmm! 

IMG_8354

And last but not least, we learned how to make these fancy looking stuffed pork chops. Who knew quick could look this fancy?   Company coming over for dinner? No worries… these will take no time at all…. even with the amazing sauce! The most perfect pork chop dish ever… seriously. Just ask anyone that attended the class. 

IMG_8435

You know I give all these dishes a two thumbs up! Happy to bring deliciousness and convenience your way!

IMG_7692

I have to give a huge shout out to my awesome assistants. This beautiful one is my niece Lisa. Luckily my other assistant, Chelsea, shot this photo of her. A big “Thank you!” to Lisa, Debbie, Chelsea and Sarah! Love you all! 

IMG_7688

Thanks to all that attended and feasted the night away! Now get cooking…. you have no more excuses! 

Leave A Comment ~ 0

Tuesday’s Tools and Tips- Breville Immersion Blender Review

IMG_7586


Sur La Table sent me this product to do a review on. This is the Breville immersion blender. Can I tell you I was a bit nervous about it? You all know how much I shop at and love Sur La Table and I was thrilled to have them send me a product to review. But… what if I didn’t like the way it performed? If there is one thing you can count on with me… it is honesty. I believe in complete honesty and I would and will always tell you the truth! I have tried many different immersion blenders and have not liked any of them. Except for my “un- fancy”, SO not ” high end” Braun immersion blender. 

Immersion blenders are so convenient and easy to use. But I found many of them splattered and disappointed me with their performance. Why oh why did Sur La Table choose an immersion blender for me to review? I was not optimistic about it as you can tell. But put it to the test I did.

IMG_6465

I started with the most often dish I use it for. Soup! Taking soup and pouring it into a blender to puree it is such a pain. A good immersion blender can do the job with much more ease and less mess. 

IMG_6511

Well people… my worries were over. This way out-performed my beloved Braun immersion blender! It was powerful, quiet, didn’t splatter and pureed the soup like a dream! It certainly passed the first test!

IMG_8467

On to chopping and crushing. It comes with this container equipped with a rotating blade and attachment. 

IMG_8499

Perfection. I was able to control the blender easily get the nuts to the size I wanted.

IMG_8508

Now on to the harder task. If you look back on past recipes, I made White Chocolate Peppermint Dipping Sticks. An important part of that recipe includes finely crushed candy canes. I have only used my food processor for that hard task. As it has a very sharp blade and powerful motor. The rotating blade that comes with this piece is not as sharp. I seriously had my doubts about this one.

IMG_8513

And away we go!

IMG_8529

Look at that! As fine as I could ever want it! The best part? It was effortless! Boy oh boy… this baby has passed the test with flying colors! And this is SO much easier to clean than all the parts on my beloved food processor. Double win!

IMG_8570

On to salad dressing. You all know how much I make salad dressing!

IMG_8609

Not only was it a snap, but you can store your salad dressing in the same container you blended it in (Obviously I make more than this small amount of dressing. This was just a sample amount for this test) . It comes with a lid that has a tight seal. Now that’s convenience for you! I guess I was so surprised and happy with this amazing blender that I forgot to use the whipping attachment. I am out of town as I write this so I am not able to put that to the test, but I am 99.9% sure that it too will pass with flying colors! Egg whites, whipping cream, frosting….. you name it! 

So, my honest opinion? GO GET THIS IMMERSION BLENDER NOW! That endorsement is the honest truth! Oh… and thank you Sur La Table for an amazing kitchen tool that will make my life so much easier in the kitchen!

Leave A Comment ~ 0

Valentines Day Dinner Menu In UTAH!

Monday February 17, 2014 – Monday February 17, 2014

31801 Via Perdiz

View MapMap and Directions | Register

Description:

Steak

IMG_8200

IMG_8122

Lava cake


Hello Friends,

My Valentines menu was so good and popular that I did it 4 times in California and now I am bringing it to Utah! Here’s your chance Utah friends to take one of my classes.

I have worked on some of the classic “favorites” as well as some creative favorites for this one. Together they will make for a memorable meal that will never be forgotten. I know these dishes will become favorites of yours that you will make over and over again. In fact, when I tasted them, I surprised the heck out of myself! Man… sometimes I am good…. I mean really, really good! Ahem…. ok enough boasting.

The special Valentines Day menu I created for you is: Steak over a Crostini with Cheese (and a ton of other amazing flavors), A Wedge Salad with Blue Cheese Dressing, Roasted Cauliflower with Chimichurri (This is the dish that will be my claim to fame… seriously… how did I make cauliflower that good?!), Cheesy Spoon Bread (think spoon dipping goodness) and Chocolate Molten Lava Cakes for the “knock it out of the park” finish!

See what I mean? This menu is simply perfect in every way. This class is would also make the perfect date night… an early Valentines Day present! But no worries if you are coming solo.. there will be couples and solo learners/ feasters! It will be a fun night for all.

The class will be held on February 17th at 5:30 pm in Lehi. I first demonstrate how to make all the dishes and then we feast! So come hungry! The cost of each class is $60.00 per person. Let me know if you are interested and I will contact you with more information about the class and tentatively put your name on the reservation list.  You can call me (949-533-4038) to pay by credit card. My classes are filling up really fast so please let me know if you are interested before you send me a check to make sure there is an open spot. For cancellations, I require a “10 days before the class” notice for a refund.

I have had a lot of requests for private classes. I have taught gatherings for birthdays, couples classes, or just someone that wanted to learn a past menu and got a group of friends together to learn. I love doing these party- like classes and talk about a good time! Please feel free to contact me anytime if you are interested in doing such a class. I require 16 people for a private class.

Anyone is invited to attend, so please feel free to forward this on to your friends, neighbors and family. I hope you can join me for another gathering of delicious food and a fun night!

I am excited to announce that my Gatherings….. for the love of food website/blog is up!! The website address is www.jennysgatherings.com. I have a new recipe from my last class as well as cooking and product tips posted on it so check it out! Be sure to tell all your friends to visit me on me my blog!

Happy Cooking!

Jenny Evans

Register

Leave A Comment ~ 0

Tools and Tip of the Week- Melting Chocolate in the Microwave

I know many of you get frustrated when you have to melt chocolate for a recipe. I am going to let you in on a big secret and make your life easier! 99.9% of the time, I melt chocolate in the microwave. Yup… the microwave. I know most of you have tries this and have had epic failures, but let me teach you my ways.

IMG_8231

Let’s start with the easiest chocolate. This is Ghiradelli’s baking bar. It melts like a dream. I take the square and break them in quarters with my fingers. It’s a snap… I promise! 

IMG_8235Place your chocolate (this is 1 1/2 bars) in the microwave in a microwavable bowl and heat on high for 1 minute. I then heated it for three more 30 second intervals. 

IMG_8241

This is what it looks like after the melting time. I just gave it a 2 second stir to smooth it out. That was a snap!

IMG_7674Now for the trickier fellows. These are Nestle Tollhouse semi-sweet chocolate chips (about 1/2 cup). This is what they look like right out of the bag. I used the same cooking time as the broken up baking chocolate bar. 1 minute, then three 30 second intervals on high.

IMG_7677

This is what they look like after the cooking time. I am pretty sure this is where you have taken the wrong turn. I am sure you have thought they should look like melted chocolate at this point. Instead they look the same, except they are shiny and glistening now. If I were to cook them any longer, they would burn. EPIC fail. 

IMG_7678

The key is the shiny, glistening look. Take your spatula or spoon and lightly touch them. They should instantly melt to the touch. 

IMG_7681This is what it looks like after a quick 2 second stir. PERFECT! The key is to first start out with a 1 minute high setting. After that, only cook in 30 second intervals and check to see if the chocolate is glistening or melted (If you are using a baking bar). Once they look the way I said, give it a quick stir. How simple is that! No more pulling out the double boiler and taking forever to melt your chocolate. Does this mean more chocolate desserts for your upcoming year? I hope so and I am sure your family does too! 

Leave A Comment ~ 0

Tuesday’s Tools and Tips- Bar Keepers Friend

Oh my…. I just realized I haven’t been posting my “Tuesday Tools and Tips” this month! I guess I have been busy with a lot of other things, but no worries.. I am hopefully back in the routine! 

IMG_7916

My tip for the week is this amazing cleaner Bar Keepers Friend. For those of you that have been in my kitchen, you have seen my big collection of All Clad pots and pans hanging from my big rack. People always ask me how I keep them clean. You know I use them all A LOT! Yes, there are times when I wonder if I will ever be able to get a certain pot or pan clean again. Well my friends, they are not stained black because of this amazing product! It is seriously like magic! It can get anything out of my pans and they end up perfectly clean again. I always recommend non stick pots and pans to anyone looking to invest in a nice collection (Why… that is for another post). With Bar Keepers Friend, you don’t have to stress about keeping your stainless steel pots and pans clean. I buy my cans at my local grocery store or Target. Easy to find and so inexpensive! If you haven’t discovered this product yet, run out and get some. You can thank me later!

Leave A Comment ~ 0

Bring on 2014 With an Amazing Dip Recipe!

I don’t know about you, but me? …. I am way excited to bring on the new year! I loved 2013 and look forward to what 2014 will bring! Years past (when the hubby and I were “young married’s”) we loved to go out to dinner with a large group of friends (sans kids) to celebrate the big event. Now? We have learned that our kids are growing up all too fast and we want to spend every second we can with them. Our perfect New Year’s Eve is spending it at home with our kids (At least the ones that want to stay home with us! And more and more they are wanting to… hooray!), playing all sorts of games, eating all kinds of great food, maybe watching a flick…. all cuddled up on our large sofa and making as much noise as we can at the stroke of midnight! It is truly a night of perfection to me. We usually get some extended family members stopping in at some point and we love it… the more the merrier! I look forward to this favorite night of mine every year. 

The food is an important part of the night as it is at every party! I want to share with you an amazing dip you can and should share with those lucky enough to bring on the new year with you! It is an amazing, baked artichoke dip I serve in a bread bowl along with chunks of yummy bread. It is a cinch to make so be sure to try this one out!

IMG_5173

You can find the recipe for this amazing dip HERE.

Another favorite of mine is a well put together cheese platter such as this one.

IMG_6920

What makes a cheese platter a good one? One with a variety of cheeses (hard, soft, mild, medium, sharp, goat, sheep and cow’s milk cheese varieties). Above, we picked some with dried apricots and cranberries in the cheese… nice sweet and savory combination. I like to add honey, fruit (grapes, pears, figs are all good choices), and nuts (I also added a little olive tapenade for my honey up there) on the platter to accompany the cheese. You should serve your cheese at room temperature so this is a great thing to have out for your shin dig. Serve with crackers or thinly sliced crusty bread. Another great addition is some aged, dry salami and or some cured italian meats such as proscuitto, coppa or bresaola you can place on a small cutting board right next to the cheese. These are perfect to snack on throughout the night and helps balance out all the sweets that we nibble on all night. 

There you have it! Some perfect additions I hope you will enjoy this New Year’s Eve. Since I won’t be seeing you on the big night (unless you happen to stop by) …. “HAPPY NEW YEARS MY FRIENDS!”

Leave A Comment ~ 0